What is animation on Android?

Animation helps you to apply the effect on any view, image, or text in mobile app development. It allows you to change any type of motion on the object with a specific view. Animation is generally used to give your UI a look and feel. There are three types of animation.

  1. Property Animation
  2. View Animation
  3. Drawable Animation

1. Property Animation

This animation is one of the frameworks that allows almost everything.
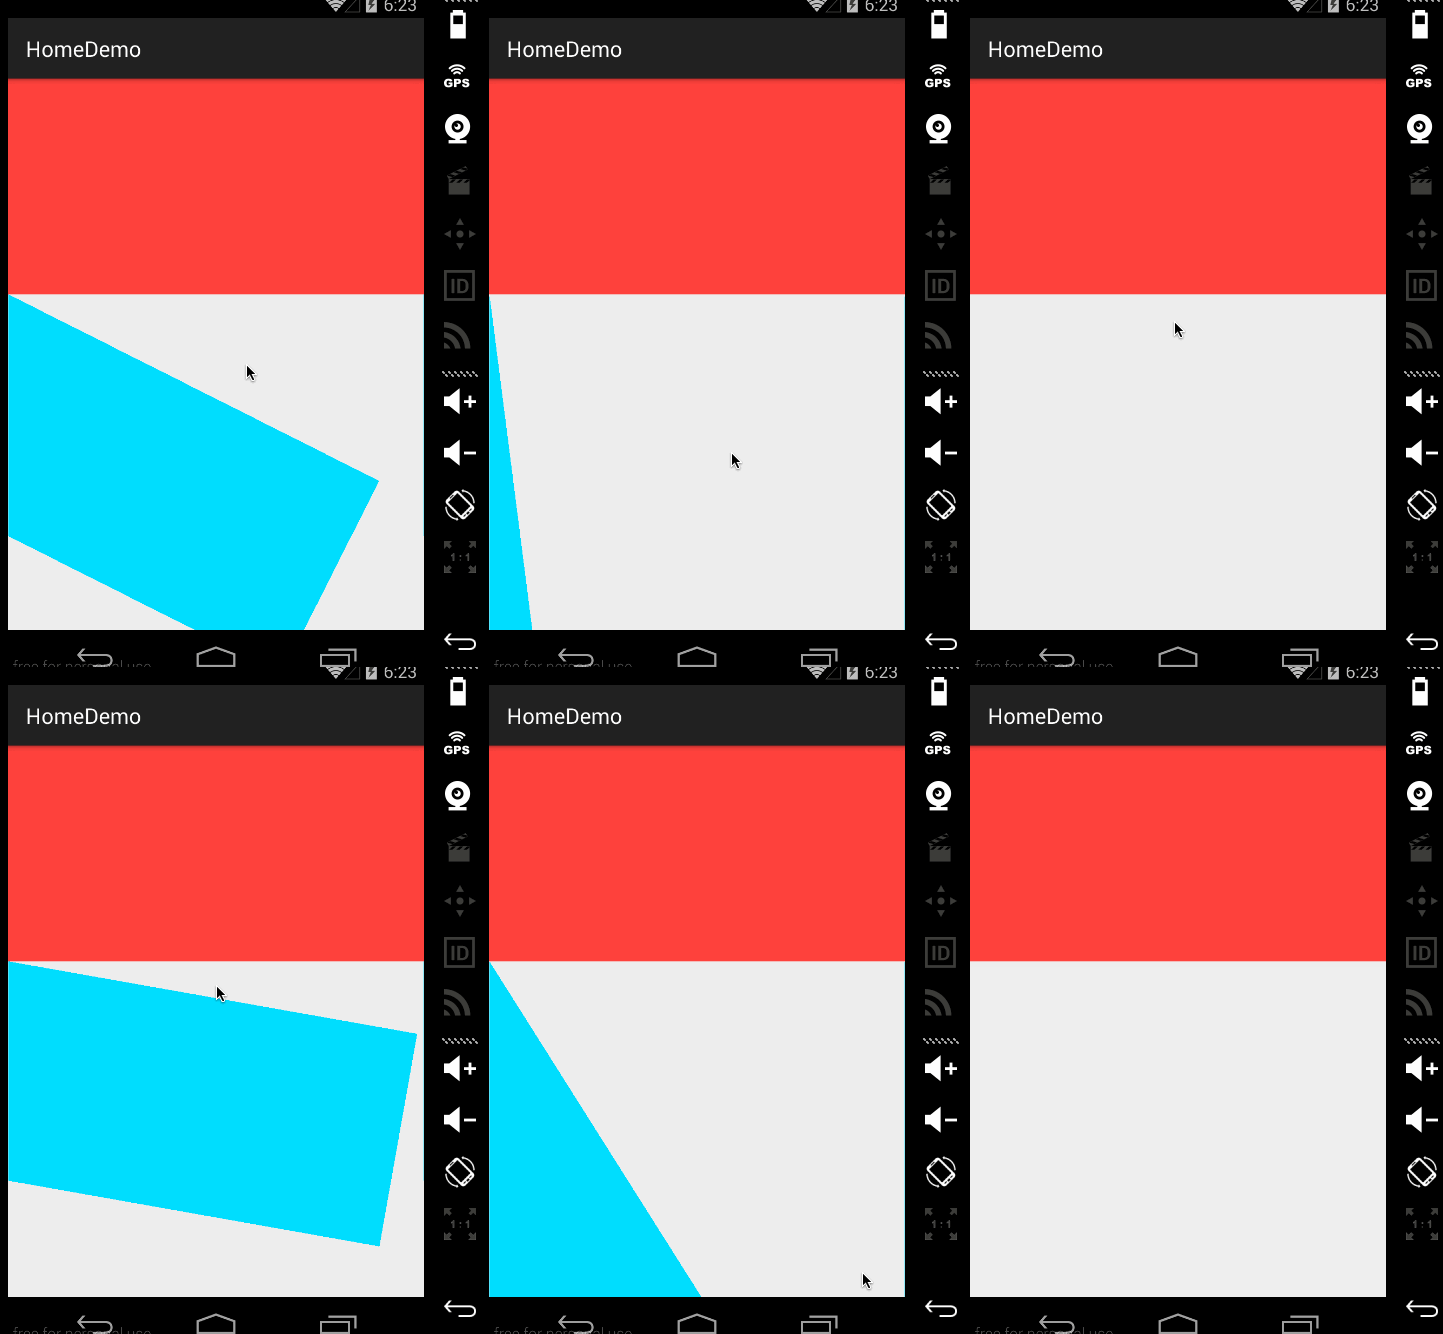

2. View Animation 

Use view animation to add animation to a specific view. Calculates animation information such as rotation, start point, and endpoint.the example below of the view animation. 


3. Drawable animation

This drawable animation works in any place as we can use it in a splash screen.


Step 1: Create the project, or if you already have, then open those projects.


Step 2: Create different animation files and save them in the raw folder.


1. Blink animation

<?xml version="1.0" encoding="utf-8"?>
<set xmlns:android="http://schemas.android.com/apk/res/android">
<alpha android:fromAlpha="0.0"
android:toAlpha="1.0"
android:interpolator="@android:anim/accelerate_interpolator"
android:duration="200"
android:repeatMode="reverse"
android:repeatCount="infinite"/>
</set>

2. Fade animation

<?xml version="1.0" encoding="utf-8"?>
<set xmlns:android="http://schemas.android.com/apk/res/android"
android:interpolator="@android:anim/accelerate_interpolator">

<!-- duration is the time for which animation will work-->
<alpha
android:duration="1000"
android:fromAlpha="0"
android:toAlpha="1" />

<alpha
android:duration="1000"
android:fromAlpha="1"
android:startOffset="1000"
android:toAlpha="0" />

</set>

3. Move animation

<?xml version="1.0" encoding="utf-8"?>
<set
xmlns:android="http://schemas.android.com/apk/res/android"
android:interpolator="@android:anim/linear_interpolator"
android:fillAfter="true">

<translate
android:fromXDelta="0%p"
android:toXDelta="75%p"
android:duration="700" />
</set>


4. Rotate animation

<?xml version="1.0" encoding="utf-8"?>
<set
xmlns:android="http://schemas.android.com/apk/res/android">
<rotate
android:duration="6000"
android:fromDegrees="0"
android:pivotX="50%"
android:pivotY="50%"
android:toDegrees="360" />


<rotate
android:duration="6000"
android:fromDegrees="360"
android:pivotX="50%"
android:pivotY="50%"
android:startOffset="5000"
android:toDegrees="0" />

</set>


5. slide animation

<?xml version="1.0" encoding="utf-8"?>
<set xmlns:android="http://schemas.android.com/apk/res/android"
android:fillAfter="true" >
<scale
android:duration="500"
android:fromXScale="1.0"
android:fromYScale="1.0"
android:interpolator="@android:anim/linear_interpolator"
android:toXScale="1.0"
android:toYScale="0.0" />
</set>


Step 3: Create one main.xml file for design inside the layout folder.

<?xml version="1.0" encoding="utf-8"?>
<androidx.constraintlayout.widget.ConstraintLayout xmlns:android="http://schemas.android.com/apk/res/android"
xmlns:app="http://schemas.android.com/apk/res-auto"
xmlns:tools="http://schemas.android.com/tools"
android:id="@+id/main"
android:layout_width="match_parent"
android:layout_height="match_parent"
tools:context=".MainActivity">


<ImageView
android:id="@+id/imageview"
android:layout_width="200dp"
android:layout_height="200dp"
android:layout_centerHorizontal="true"
android:layout_marginTop="28dp"
android:contentDescription="@string/app_name"
android:src="@drawable/yourgifpath"
app:layout_constraintEnd_toEndOf="parent"
app:layout_constraintHorizontal_bias="0.497"
app:layout_constraintStart_toStartOf="parent"
app:layout_constraintTop_toTopOf="parent" />

// Button click to perform the blink animation
<Button
android:id="@+id/BTNblink"
style="@style/TextAppearance.AppCompat.Widget.Button"
android:layout_width="wrap_content"
android:layout_height="wrap_content"
android:layout_margin="10dp"
android:layout_weight="1"
android:padding="3dp"
android:text="blink"
android:textColor="@color/white"
app:layout_constraintEnd_toEndOf="parent"
app:layout_constraintStart_toStartOf="parent"
app:layout_constraintTop_toBottomOf="@+id/BTNslide" />

// Button click to perform the stop animation
<Button
android:id="@+id/BTNstop"
android:layout_width="wrap_content"
android:layout_height="wrap_content"
android:layout_marginTop="28dp"
android:text="stop_animation"
app:layout_constraintEnd_toEndOf="parent"
app:layout_constraintStart_toStartOf="parent"
app:layout_constraintTop_toBottomOf="@+id/BTNzoom" />

// Button click to perform the move animation
<Button
android:id="@+id/BTNmove"
style="@style/TextAppearance.AppCompat.Widget.Button"
android:layout_width="wrap_content"
android:layout_height="wrap_content"
android:layout_margin="10dp"
android:layout_marginTop="24dp"
android:layout_weight="1"
android:padding="3dp"
android:text="move"
android:textColor="@color/white"
app:layout_constraintEnd_toEndOf="parent"
app:layout_constraintStart_toStartOf="parent"
app:layout_constraintTop_toBottomOf="@+id/BTNfade" />

// Button click to perform the move animation
<Button
android:id="@+id/BTNzoom"
style="@style/TextAppearance.AppCompat.Widget.Button"
android:layout_width="wrap_content"
android:layout_height="wrap_content"
android:layout_margin="10dp"
android:layout_weight="1"
android:padding="3dp"
android:text="zoom"
android:textColor="@color/white"
app:layout_constraintEnd_toEndOf="parent"
app:layout_constraintStart_toStartOf="parent"
app:layout_constraintTop_toBottomOf="@+id/BTNrotate" />

// Button click to perform the slide animation
<Button
android:id="@+id/BTNslide"
style="@style/TextAppearance.AppCompat.Widget.Button"
android:layout_width="wrap_content"
android:layout_height="wrap_content"
android:layout_margin="10dp"
android:layout_marginTop="8dp"
android:layout_weight="1"
android:padding="3dp"
android:text="slide"
android:textColor="@color/white"
app:layout_constraintEnd_toEndOf="parent"
app:layout_constraintStart_toStartOf="parent"
app:layout_constraintTop_toBottomOf="@+id/BTNmove" />

// Button click to perform the fade animation
<Button
android:id="@+id/BTNfade"
style="@style/TextAppearance.AppCompat.Widget.Button"
android:layout_width="wrap_content"
android:layout_height="wrap_content"
android:layout_margin="10dp"
android:layout_marginTop="28dp"
android:layout_weight="1"
android:padding="3dp"
android:text="fade"
android:textColor="@color/white"
app:layout_constraintEnd_toEndOf="parent"
app:layout_constraintStart_toStartOf="parent"
app:layout_constraintTop_toBottomOf="@+id/imageview" />

// Button click to perform the rotate animation
<Button
android:id="@+id/BTNrotate"
style="@style/TextAppearance.AppCompat.Widget.Button"
android:layout_width="wrap_content"
android:layout_height="wrap_content"
android:layout_margin="10dp"
android:layout_weight="1"
android:padding="3dp"
android:text="clockwise"
android:textColor="@color/white"
app:layout_constraintEnd_toEndOf="parent"
app:layout_constraintStart_toStartOf="parent"
app:layout_constraintTop_toBottomOf="@+id/BTNblink" />

</androidx.constraintlayout.widget.ConstraintLayout>

Step 4: Create one file named main_activity.java file.

public class MainActivity extends AppCompatActivity {

ImageView imageView;
Button blink, rotate, fade, move, slide, zoom, stop;

@Override
protected void onCreate(Bundle savedInstanceState) {
super.onCreate(savedInstanceState);
setContentView(R.layout.activity_main);
imageView = findViewById(R.id.imageview);
blink = findViewById(R.id.BTNblink);
rotate = findViewById(R.id.BTNrotate);
fade = findViewById(R.id.BTNfade);
move = findViewById(R.id.BTNmove);
slide = findViewById(R.id.BTNslide);
zoom= findViewById(R.id.BTNzoom);
stop = findViewById(R.id.BTNstop);

blink.setOnClickListener(new View.OnClickListener() {
@Override
public void onClick(View v) {
Animation animation = AnimationUtils.loadAnimation(getApplicationContext(), R.anim.blink_animation);
imageView.startAnimation(animation);
}
});

rotate.setOnClickListener(new View.OnClickListener() {
@Override
public void onClick(View v) {
Animation animation = AnimationUtils.loadAnimation(getApplicationContext(), R.anim.rotate_animation);
imageView.startAnimation(animation);
}
});
fade.setOnClickListener(new View.OnClickListener() {
@Override
public void onClick(View v) {
Animation animation = AnimationUtils.loadAnimation(getApplicationContext(), R.anim.fade_animation);
imageView.startAnimation(animation);
}
});
move.setOnClickListener(new View.OnClickListener() {
@Override
public void onClick(View v) {
Animation animation = AnimationUtils.loadAnimation(getApplicationContext(), R.anim.move_animation);
imageView.startAnimation(animation);
}
});
slide.setOnClickListener(new View.OnClickListener() {
@Override
public void onClick(View v) {
Animation animation = AnimationUtils.loadAnimation(getApplicationContext(), R.anim.slide_animation);
imageView.startAnimation(animation);
}
});
zoom.setOnClickListener(new View.OnClickListener() {
@Override
public void onClick(View v) {
Animation animation = AnimationUtils.loadAnimation(getApplicationContext(), R.anim.zoom_animation);
imageView.startAnimation(animation);
}
});
stop.setOnClickListener(new View.OnClickListener() {
@Override
public void onClick(View v) {
imageView.clearAnimation();
}
});
}
}

In conclusion, animation and transition help you to enhance your Android application's overall look and feel. You must know when to use it smartly so that your application gets more engaging for the users.


365Bloggy April 29, 2024
Share this post
Click on "Edit" in the right panel to replace this with your own HTML code
Tags
SUBSCRIBE THIS FORM


Archive