How to Generate QR Code in Android using Kotlin

In today's digital world, QR codes have become our daily habit, we even pay 1 rupee by QR code, share information through QR, or even retrieve data from QR. QR code allows us to access information fast and conveniently with a simple scan. 


In this blog, we will explore how to implement QR code generation and scanning features in your Android Application

How to create QR codes for sharing information or scan them to retrieve data, this blog will provide you with the code snippets to get through it in detail. 

We will take a look at how to generate QR.


Step 1: Create a new project in Android Studio.

You can create a new project, or work with an already-created project in Android Studio.

Step 2: Add the below code in the app and leave the grade 

implementation 'android mods. library.QR generator: QRGenerator:1.0.3'

Step 3: Create one file whose name is main.xml file. That is the content design part.

<?xml version="1.0" encoding="utf-8"?>
<androidx.constraintlayout.widget.ConstraintLayout xmlns:android="http://schemas.android.com/apk/res/android"
xmlns:app="http://schemas.android.com/apk/res-auto"
xmlns:tools="http://schemas.android.com/tools"
android:id="@+id/main"
android:layout_width="match_parent"
android:layout_height="match_parent"
tools:context=".MainActivity">

// This label is use normally so the information
<TextView
android:id="@+id/textView"
android:layout_width="wrap_content"
android:layout_height="wrap_content"
android:layout_marginTop="32dp"
android:text="QR code generate"
android:textColor="@color/black
android:textSize="18sp"
app:layout_constraintEnd_toEndOf="parent"
app:layout_constraintHorizontal_bias="0.498"
app:layout_constraintStart_toStartOf="parent"
app:layout_constraintTop_toTopOf="parent" />

//  This image  generate QR code content
<ImageView
android:id="@+id/idIVQrcode"
android:layout_width="200dp"
android:layout_height="200dp"
android:layout_centerHorizontal="true"
android:layout_marginTop="32dp"
android:contentDescription="QR Code"
app:layout_constraintEnd_toEndOf="parent"
app:layout_constraintHorizontal_bias="0.497"
app:layout_constraintStart_toStartOf="parent"
app:layout_constraintTop_toBottomOf="@+id/textView" />

//Enter any type of text  in edit text

<android.appcompat.widget.AppCompatEditText
android:id="@+id/appCompatEditText"
android:layout_width="match_parent"
android:layout_height="wrap_content"
android:layout_marginStart="20dp"
android:layout_marginTop="340dp"
android:layout_marginEnd="20dp"
android:hint=" QR code data"
app:layout_constraintEnd_toEndOf="parent"
app:layout_constraintHorizontal_bias="0.473"
app:layout_constraintStart_toStartOf="parent"
app:layout_constraintTop_toBottomOf="@+id/textView" />

// Click the no button then generate the QR code
<Button
android:layout_width="match_parent"
android:layout_height="wrap_content"
android:layout_marginTop="44dp"
android:layout_marginStart="20dp"
android:layout_marginEnd="20dp"
android:text="submit"
app:layout_constraintEnd_toEndOf="parent"
app:layout_constraintHorizontal_bias="0.0"
app:layout_constraintStart_toStartOf="parent"
app:layout_constraintTop_toBottomOf="@+id/appCompatEditText" />

</androidx.constraintlayout.widget.ConstraintLayout>

Step 4: Create a .kt file to generate qrcode.

import android.graphics.Bitmap
import android.graphics.Point
import android.os.Bundle
import android.text.TextUtils
import android.view.Display
import android.view.WindowManager
import android.widget.Button
import android.widget.EditText
import android.widget.ImageView
import android.widget.Toast

class MainActivity : AppCompatActivity() {

// for our image view, edit text and a button.
lateinit var qrIV: ImageView
lateinit var msgEdt: EditText
lateinit var generateQRBtn: Button

// a variable for bitmap
lateinit var bitmap: Bitmap


// a variable for qr encoder.
lateinit var qrEncoder: QREncoder

override fun onCreate(savedInstanceState: Bundle?) {
super.onCreate(savedInstanceState)
setContentView(R.layout.activity_main)

// initializing all our variables.
qrIV = findViewById(R.id.idIVQrcode)
msgEdt = findViewById(R.id.idEdt)
generateQRBtn = findViewById(R.id.idBtnGenerateQR)

// listener for our generated QR button.
generateQRBtn.setOnClickListener {
// on the below line we are checking if msg edit text is empty or not.
if (TextUtils.isEmpty(msgEdt.text.toString())) {

// on below line we are displaying toast message to display enter some text
Toast.makeText(applicationContext, "Enter your message", Toast.LENGTH_SHORT).show()
} else {
// on below line we are getting service for window managerval windowManager: WindowManager = getSystemService(WINDOW_SERVICE) as WindowManager

// variable for our default display
val display: Display = windowManager.defaultDisplay

// for point which is use to display in qr code
val point: Point = Point()
display.getSize(point)

// height and width of our point
val width = point.x
val height = point.y

// dimensions for width and height
var dimen = if (width < height) width else height
dimen = dimen * 3 / 4

// on below line we are initializing our qr encoder
qrEncoder = QRGEncoder(msgEdt.text.toString(), null, QRGContents.Type.TEXT, dimen)

// on below line we are running a try
// and catch block for initializing our bitmap
try {
// initializing our bitmap
bitmap = qrEncoder.encodeAsBitmap()

//This bitmap to our image view
qrIV.setImageBitmap(bitmap)
} catch (e: Exception) {

// are handling exception
e.printStackTrace()

}}}}

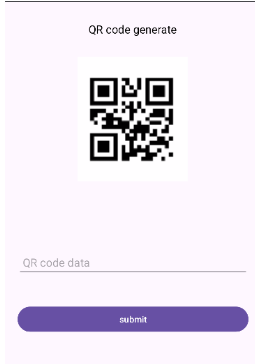
Step 5: Final generated QR code. 


Hence, from the above steps you have learned how to implement QR code generation and scanning features in your mobile Application. Remember, you can use QR codes in various scenarios, as we have discussed above for sharing contact information, URLs, or product details. 

The major benefit of QR code is that it enhances the user experience and provides a convenient way to exchange data information. You always experiment with different customization options and explore additional features to make your Android Application shine.


365Bloggy May 6, 2024
Share this post
Tags
SUBSCRIBE THIS FORM


Archive