Flutter-Sharing Data

Flutter is sharing data provided on different screens. You can send and receive data on a particular screen. 

Step 1: Create a new Flutter application, or you can use an already existing project. 
      1.1:  Create a new project


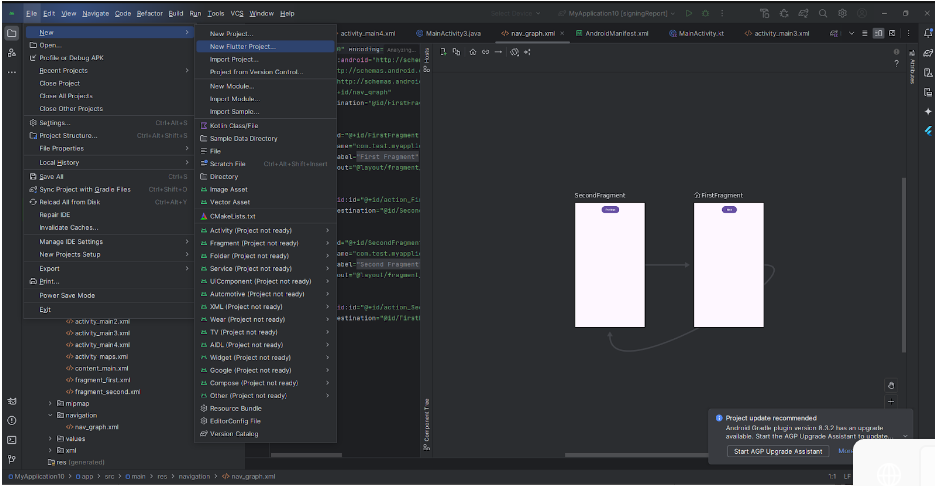
1.2 : Already existing project.


Step 2: Add new TextFiled in the first screen syntax, as shown below.

TextEditingController object=TextEditingController();

Texteditingcontroller object mention below

  Child : TextFiled(  

//controller attribute

Decoration : InputDecoration (

Border: OutLineInputBorder(),

labelText : “Enter your name “), 

),           

Step 3: Add a new ElevatedButton in the first screen syntax below mentioned.

ElevatedButton(

onPressed: () {

Navigator.of(context) .push(

MatetrialPageRoute(

 Builder :(context) => nextpage(

   name : _name.text,

  email : _email.text,

  Phone: _phoneno.text,)));

  },

Child : Text(“SEND”) );

Step 4: Create a main.dart file in your project. libs>new>create a new data file.

import 'package:flutter/material.dart';

import 'nextpage.dart';

void main() {

runApp(const MyApp());

}

class MyApp extends StatelessWidget {

const MyApp({Key? key}) : super(key: key);

@override

Widget build(BuildContext context) {

return MaterialApp(

title: 'Flutter Demo',

theme: ThemeData(

primarySwatch: Colors.green,

),

home: const MyHomePage(title: 'Condidroot solution'),

);

}

}

class MyHomePage extends StatefulWidget {

const MyHomePage({Key? key, required this.title}) : super(key: key);

final String title;

@override

State<MyHomePage> createState() => _MyHomePageState();

}

class _MyHomePageState extends State<MyHomePage> {

// To listen to the changes in the textfield.

TextEditingController _name = TextEditingController();

TextEditingController _email = TextEditingController();

TextEditingController _phoneno = TextEditingController();

@override

Widget build(BuildContext context) {

return Scaffold(

appBar: AppBar(

title: Text(widget.title),

),

body: Center(

child: Column(

mainAxisAlignment: MainAxisAlignment.center,

children: [

Padding(

padding: const EdgeInsets.all(25),

child:Image.asset( 'assets/images/company_logo.png',

width: 150,

height: 150,

fit: BoxFit.cover,

cacheWidth:100 * MediaQuery.of(context).devicePixelRatio.round(), )

),

Padding(

padding: const EdgeInsets.all(25),

child: TextField(

// To set the appropriate controller to the text field.

controller: _name,

decoration: const InputDecoration(

border: OutlineInputBorder(), labelText: "Enter your Name"),

),

),

Padding(

padding: const EdgeInsets.all(25),

child: TextField(

controller: _email,

decoration: const InputDecoration(

border: OutlineInputBorder(),

labelText: "Enter your Email"),

),

),

Padding(

padding: const EdgeInsets.all(25),

child: TextField(

controller: _phoneno,

decoration: const InputDecoration(

border: OutlineInputBorder(),

labelText: "Enter your Phone Number"),

),

),


// Button to go to nextpage.

ElevatedButton(

onPressed: () {


// Navigator to the next page.

Navigator.of(context).push(

MaterialPageRoute(


// Builder for the nextpage class's constructor.

builder: (context) => nextpage(


// Data as arguments to send to next page.

name: _name.text,

email: _email.text,

phoneno: _phoneno.text,

)),

);

},

child: Text("SEND"))],),),);}}

Step 5: Create a new next page.dart file in your mobile application project. libs>new>create a new data file.

import 'package:flutter/material.dart';

class nextpage extends StatelessWidget {

String name, email, phoneno;

// Constructor to get the data from the previous page.

nextpage({required this.name, required this.email, required this.phoneno});

@override

Widget build(BuildContext context) {

// To listen to the changes in the textfield.

TextEditingController _name = TextEditingController(text: name);

TextEditingController _email = TextEditingController(text: email);

TextEditingController _phoneno = TextEditingController(text: phoneno);

return Scaffold(

appBar: AppBar(

title: const Text('Next Page'),

),

body: Center(

child: Column(

mainAxisAlignment: MainAxisAlignment.center,

children: [

Padding(

padding: const EdgeInsets.all(25),

child: TextField(

// To set the appropriate controller to the text field.

controller: _name,

decoration: const InputDecoration(

border: OutlineInputBorder(),

labelText: "Name",

),

),

),

Padding(

padding: const EdgeInsets.all(25),

child: TextField(

controller: _email,

decoration: const InputDecoration(

border: OutlineInputBorder(),

labelText: "Email",

),

),

),

Padding(

padding: const EdgeInsets.all(25),

child: TextField(

controller: _phoneno,

decoration: const InputDecoration(

border: OutlineInputBorder(),

labelText: "Number",

),

),

),

],

),

),

);

}

}

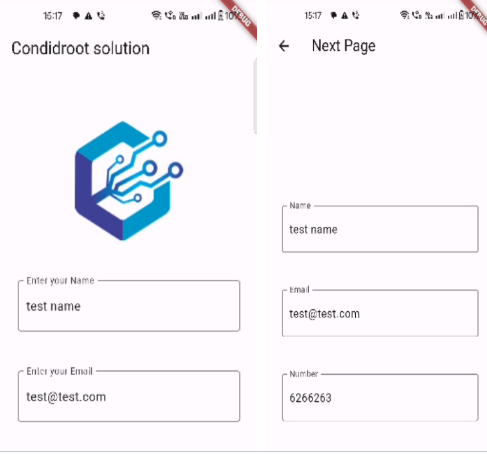
Step 6: Output of the above code. 


Happy coding!


365Bloggy May 13, 2024
Share this post
Tags
SUBSCRIBE THIS FORM


Archive