Custom Bottom Navigation Bar in Flutter

An app's bottom navigation bar is a material widget that allows users to choose or navigate between its various pages. It is typically utilised as the scaffold when used in conjunction with Scaffold.bottomNavigationBar.

In this article, you will learn how to create your bottom navigation bar. So let’s take one example of the bottom navigation of Mobile application.


Step-by-Step Implementation

Step 1: Create a New Project in Android Studio (File >new flutter project)


Step 2: Adding material package

Import method the runApp method in the main function call first while run the application.

 import 'package:flutter/material.dart';

 void main() {

     runApp(RunMyApp());

 }

Step 3: Creating a stateless widget 

We can create a stateless widget that contains MaterialApp widget,AppBar,etc.

 class RunMyApp extends StatelessWidget {

     const RunMyApp({super.key});  

    @override

    Widget build(BuildContext context) {

    return MaterialApp(home);

     }

 }

Step 4: Create a BottomNavigationBar in Home.dart file.
 bottomNavigationBar: Container(
height: 60,
child: Row(
mainAxisAlignment: MainAxisAlignment.spaceAround,
children: [
IconButton(
enableFeedback: false,
onPressed: () {
setState(() {
pageIndex = 0;
});
},
icon: pageIndex == 0
? const Icon(
Icons.home_filled,
color: Colors.white,
size: 25,
)
: const Icon(
Icons.home_outlined,
color: Colors.white,
size: 25,
),
),
IconButton(
enableFeedback: false,
onPressed: () {
setState(() {
pageIndex = 1;
});
},
icon: pageIndex == 3
? const Icon(
Icons.widgets_rounded,
color: Colors.white,
size: 25,
)
: const Icon(
Icons.widgets_outlined,
color: Colors.white,
size: 25,
),
),
IconButton(
enableFeedback: false,
onPressed: () {
setState(() {
pageIndex = 3;
});
},
icon: pageIndex == 0
? const Icon(
Icons.person,
color: Colors.white,
size: 25,
)
: const Icon(
Icons.person_outline,
color: Colors.white,
size: 25,
),
),

],
),
)
Step 5: Full code of BottomNavigationBar.

 Step 5.1: Create a Page1.dark in lib folder. 

 import 'package:flutter/cupertino.dart';
import 'package:flutter/material.dart';
 class Page1 extends StatelessWidget {
const Page1({Key? key}) : super(key: key);

@override
Widget build(BuildContext context) {
return Container(
color: const Color(0xffffffff),
child: Center(
child: Text(
"Home",
style: TextStyle(
color: Colors.blue,
fontSize: 20,
fontWeight: FontWeight.w500,
),
),
),
);
}
}

Step 5.2: Create a Page2.dark in lib folder.

 import 'package:flutter/cupertino.dart';
import 'package:flutter/material.dart';
 class Page1 extends StatelessWidget {
const Page1({Key? key}) : super(key: key);

@override
Widget build(BuildContext context) {
return Container(
color: const Color(0xffffffff),
child: Center(
child: Text(
"List Data",
style: TextStyle(
color: Colors.blue,
fontSize: 20,
fontWeight: FontWeight.w500,
),
),
),
);
}
}

Step 5.3: Create a Page3.dark in lib folder.

 import 'package:flutter/cupertino.dart';
import 'package:flutter/material.dart';
 class Page1 extends StatelessWidget {
const Page1({Key? key}) : super(key: key);

@override
Widget build(BuildContext context) {
return Container(
color: const Color(0xffffffff),
child: Center(
child: Text(
"Profile",
style: TextStyle(
color: Colors.blue,
fontSize: 20,
fontWeight: FontWeight.w500,
),
),
),
);
}
}
Step 5.3: Final code
 import 'Page1.dart';
import 'Page2.dart';
import 'Page3.dart';
import 'Page4.dart';
void main() {
runApp(HomeScreen());
}

class HomeScreen extends StatefulWidget {
const HomeScreen({Key? key}) : super(key: key);
@override
_HomePageState createState() => _HomePageState();
}

class _HomePageState extends State<HomeScreen> {
int pageIndex = 0;

final pages = [
const Page1(),
const Page2(),
const Page3(),
const Page4(),
];

@override
Widget build(BuildContext context) {
return Scaffold(
backgroundColor:Theme.of(context).primaryColor,
appBar: AppBar(
leading: Icon(
Icons.menu,
color:Colors.blue,
),
title: Text(
"Candidroot solutions",
style: TextStyle(
color:Colors.blue,
fontSize: 20,
fontWeight: FontWeight.w400,
),
),
centerTitle: true,
backgroundColor: Colors.white,
),
body: pages[pageIndex],
bottomNavigationBar: Container(
height: 60,
decoration: BoxDecoration(
color: Colors.blue,
borderRadius: const BorderRadius.only(
topLeft: Radius.circular(0),
topRight: Radius.circular(0),
),
),
child: Row(
mainAxisAlignment: MainAxisAlignment.spaceAround,
children: [
IconButton(
enableFeedback: false,
onPressed: () {
setState(() {
pageIndex = 0;
});
},
icon: pageIndex == 0
? const Icon(
Icons.home_filled,
color: Colors.white,
size: 25,
)
: const Icon(
Icons.home_outlined,
color: Colors.white,
size: 25,
),
),
IconButton(
enableFeedback: false,
onPressed: () {
setState(() {
pageIndex = 1;
});
},
icon: pageIndex == 3
? const Icon(
Icons.widgets_rounded,
color: Colors.white,
size: 25,
)
: const Icon(
Icons.widgets_outlined,
color: Colors.white,
size: 25,
),
),
IconButton(
enableFeedback: false,
onPressed: () {
setState(() {
pageIndex = 3;
});
},
icon: pageIndex == 0
? const Icon(
Icons.person,
color: Colors.white,
size: 25,
)
: const Icon(
Icons.person_outline,
color: Colors.white,
size: 25,
),
),

],
),
),
);
}
}
 
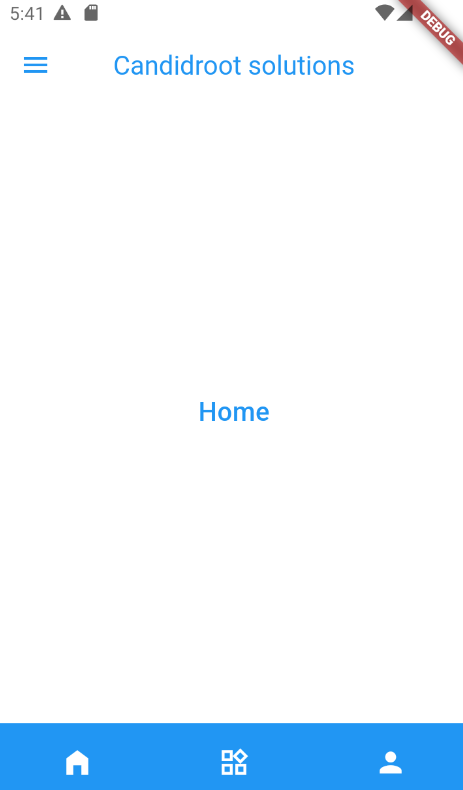
Step 6: Output of above example


Happy coding!

365Bloggy June 5, 2024
Share this post
Tags
SUBSCRIBE THIS FORM


Archive